
How to Set Up a Garage Workshop on a Budget
Building a Capable Workspace Without Breaking the Bank
Setting up a functional garage workshop does not require a five-figure budget, custom steel cabinetry, or a magazine-ready epoxy floor. For contractors, tradespeople, and serious DIYers, a workspace only needs to deliver on three fronts: efficiency, stability, and safety. Every dollar spent should directly improve your ability to measure accurately, cut cleanly, and assemble efficiently.
A budget build is about strategic resource allocation. It means saving money on foundational elements like workbenches and storage by building them yourself, while directing your capital toward high-quality lighting, reliable power, and essential tools that dictate the quality of your work.
Overview: The Anatomy of a Budget Workshop
A well-planned garage workshop is divided into distinct zones, regardless of its footprint. Failing to separate these zones leads to cross-contamination—like getting metal shavings in wood glue-ups or spraying sawdust onto freshly finished projects. A standard setup requires:
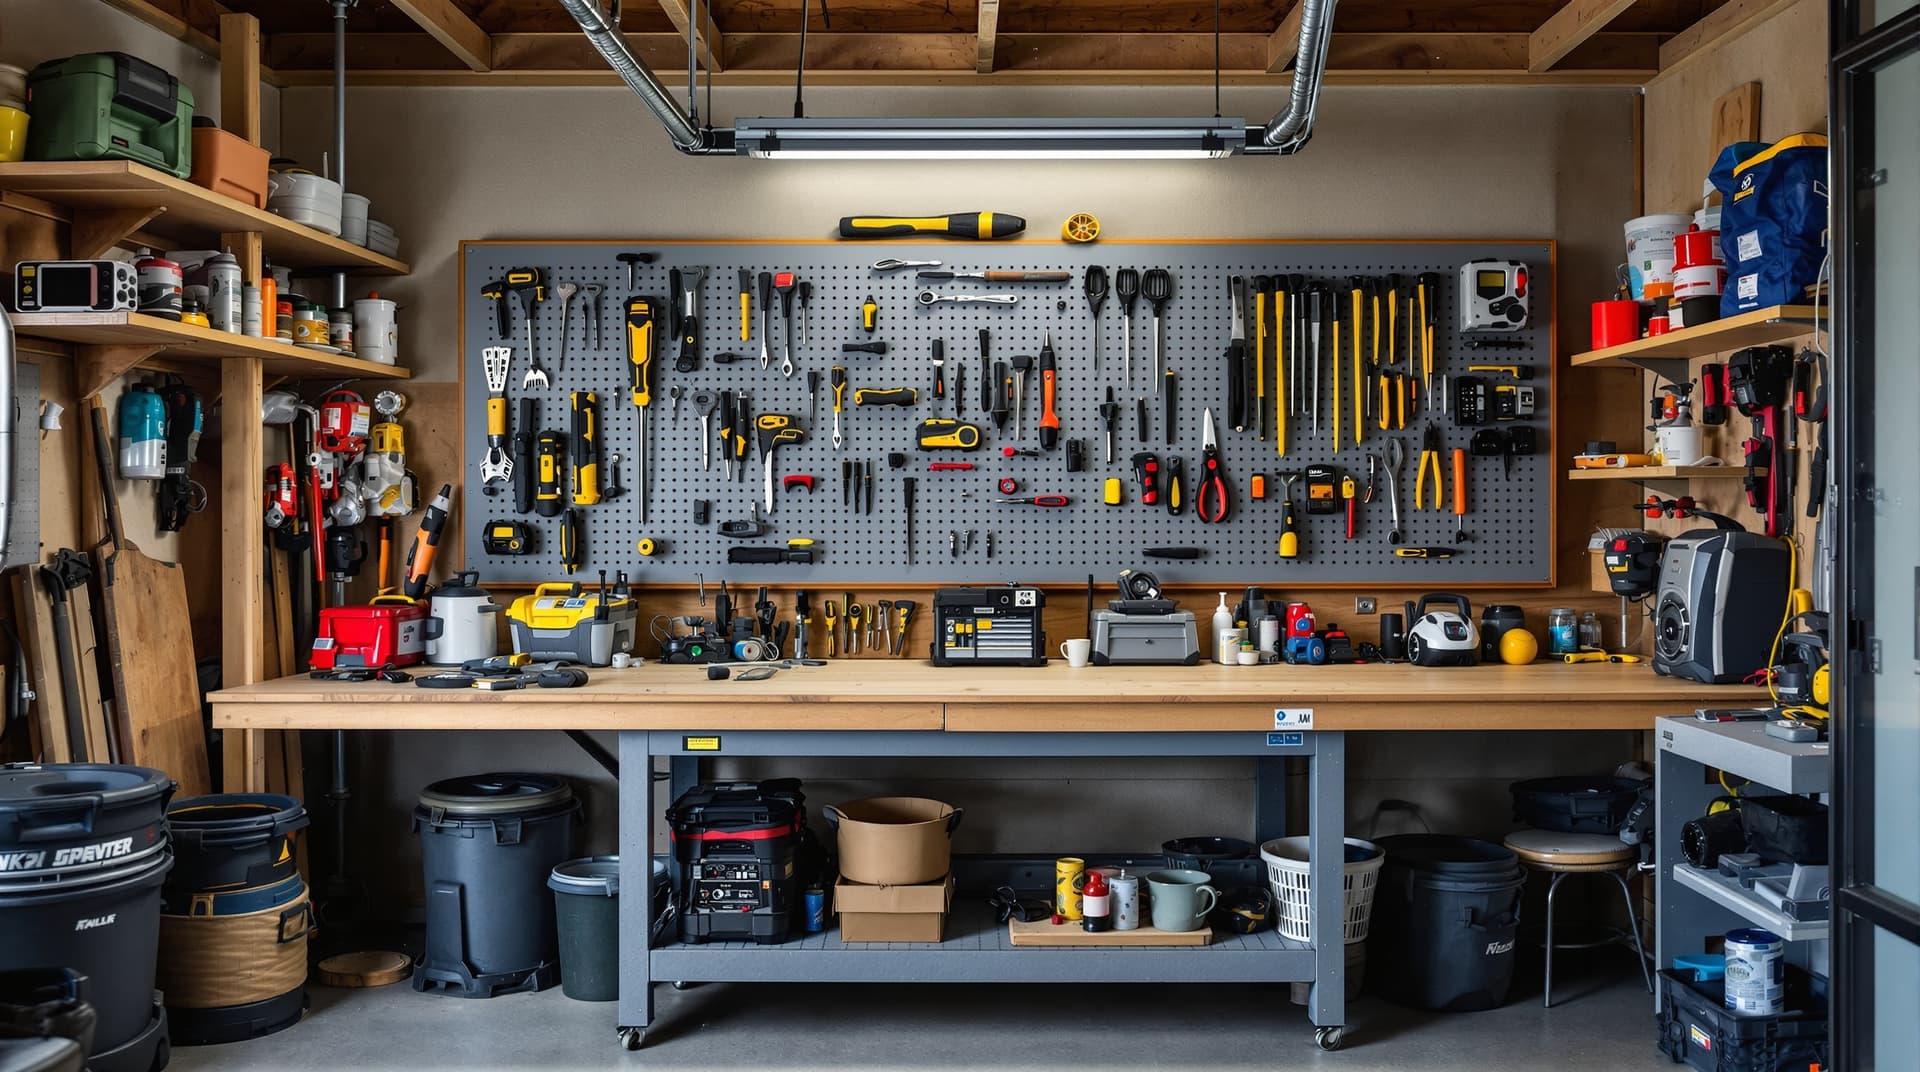
- The Workbench and Assembly Zone: The heavy-duty flat surface where the primary work happens. It must be dead-flat, rigid, and well-lit.
- The Tool Storage Zone: Wall space and under-bench areas dedicated to hand tools and power tools, keeping the main surfaces clear.
- The Machining Zone: The area for floor-standing or benchtop machinery like table saws, miter saws, and drill presses.
- The Material Storage Zone: Racks for lumber, sheet goods, and metal stock, typically positioned near the garage door for easy unloading.
When and Why to Build a Dedicated Shop
If you find yourself spending thirty minutes dragging sawhorses into the driveway, searching for extensions cords, and digging through stacked toolboxes before you can make a single cut, you need a permanent workshop setup. Time spent setting up is time stolen from actual fabrication and building.
Transitioning from a disorganized garage to a dedicated workspace drastically increases project turnaround times. It also allows you to handle more complex projects, like custom cabinetry or metal fabrication, which require fixed, level surfaces and heavy-duty workholding solutions that temporary job-site setups cannot provide.
Comparisons and Options: Where to Splurge vs. Where to Save
When operating on a strict budget, you must know when to buy premium and when to rely on sweat equity.
Where to Save: Workbenches and Storage
Do not buy pre-fabricated rolling tool cabinets or brand-name modular wall storage if funds are tight. You can build a rock-solid, 8-foot workbench using standard 2x4 framing lumber and a top made from two laminated layers of 3/4-inch MDF for under $100. This DIY bench will be heavier and more vibration-resistant than a $500 commercial steel bench. For storage, utilize a DIY French cleat system. Ripping 3/4-inch plywood strips at a 45-degree angle gives you a fully modular, incredibly strong wall storage system for the cost of a single sheet of plywood.
Where to Splurge: Lighting and Core Power Tools
Never skimp on visibility. Standard garage door openers and single bare bulbs are insufficient. Invest in 4-foot LED shop lights. You want fixtures outputting at least 4000 lumens at a 5000K (daylight) color temperature. Aim for roughly 50 to 75 lumens per square foot of workspace.
You also need to invest in a reliable power tool platform. While you can buy secondary tools cheap, your primary drill is the heartbeat of the shop. Investing in a versatile 18V or 20V cordless drill from a reputable brand (like DeWalt, Makita, or Milwaukee) ensures you have the torque and battery reliability to power through thick stock. Pair it with a versatile bit index covering multiple materials so you aren't constantly running to the hardware store for replacements.
Prepping the Garage Environment
Before moving a single piece of lumber or machinery into the space, address the infrastructure. The garage floor takes constant abuse from dropped tools, rolling heavy machinery, and chemical spills. If your concrete is aging, spend a weekend properly patching slab damage to prevent trip hazards and ensure your rolling tools glide smoothly.
If you are bringing in heavy floor-standing machinery like a drill press, band saw, or a stationary compressor, you will want to eliminate vibration and movement. You can fasten floor-standing tools directly to the slab using wedge anchors or Tapcons. Securing your equipment makes for a safer, more precise working environment.
Pro Tips for Workshop Layout and Setup
Contractors know that an efficient layout saves steps and reduces fatigue. Apply these principles to your home shop:
- The Work Triangle: Position your lumber rack, your primary cutting station (like a table saw or miter saw), and your assembly bench in a tight triangle. This minimizes the distance you have to carry heavy materials.
- Implement Mobile Bases: If you are sharing the garage with a vehicle, put your heavy machinery on locking polyurethane casters. This allows you to tuck tools against the wall and swing them out only when necessary.
- Install Proper Workholding: A heavy bench is useless if the workpiece shifts. Bolting a reliable cast-iron vise to the corner of your bench allows you to securely grind, file, and cut materials without risking injury or ruining the piece.
- Utilize Vertical Space: Floor space is premium real estate. Store air compressors under the bench, mount clamps high on the walls, and hang your shop vacuum from a bracket.
Common Mistakes to Avoid
Many beginners make critical infrastructure errors when building out their first shop. The most common mistake is ignoring power limitations. Most modern garages run on one or two 15-amp circuits. If you attempt to run a 15-amp table saw and a 12-amp shop vacuum on the same circuit simultaneously, you will trip the breaker instantly. Map out your circuits. Run your heavy machinery on a dedicated 20-amp circuit and plug your dust collection and lighting into a separate line.
Another frequent error is neglecting dust collection. Sweeping up is not enough; airborne fine dust is a serious respiratory hazard. At minimum, pair a heavy-duty wet/dry vac with a bucket-mounted cyclone separator. The cyclone drops 99% of the heavy debris into the bucket before it reaches the vacuum filter, maintaining maximum suction and extending the life of your equipment.
Buying Advice: Navigating the Used Tool Market
Stretching your budget means taking advantage of the used market. Craigslist, Facebook Marketplace, and estate sales are goldmines for heavy machinery like table saws, jointers, and band saws. Older cast-iron machinery, such as vintage Delta or Craftsman tools, often feature superior build quality and heavier trunnions than modern budget equivalents.
When buying used tools, look past superficial surface rust on cast-iron tables—that can be easily removed with a random orbital sander and a Scotch-Brite pad. Instead, check the mechanical integrity. Listen to the motor for grinding sounds that indicate shot bearings. Wiggle the arbor (the shaft that holds the blade) to check for runout or play; any side-to-side movement means the machine will never cut accurately. If the motor sounds smooth and the arbor is tight, it is usually a solid purchase.
Conclusion
A highly efficient garage workshop is built on smart planning, not an unlimited budget. By building your own heavy-duty benches, maximizing vertical storage with cleats, and prioritizing excellent lighting and core tools, you can create a professional-grade workspace on a DIY budget. Remember that a workshop is never truly finished; it is a living space that will evolve as your skills improve and your projects demand new capabilities. Start with a solid, well-planned foundation, and expand your toolset only as specific projects require it.